Environmental Monitoring of Nitrates and Other Water Quality Parameters: pH,
Environmental Monitoring of Nitrates and Other Water Quality Parameters: pH,...

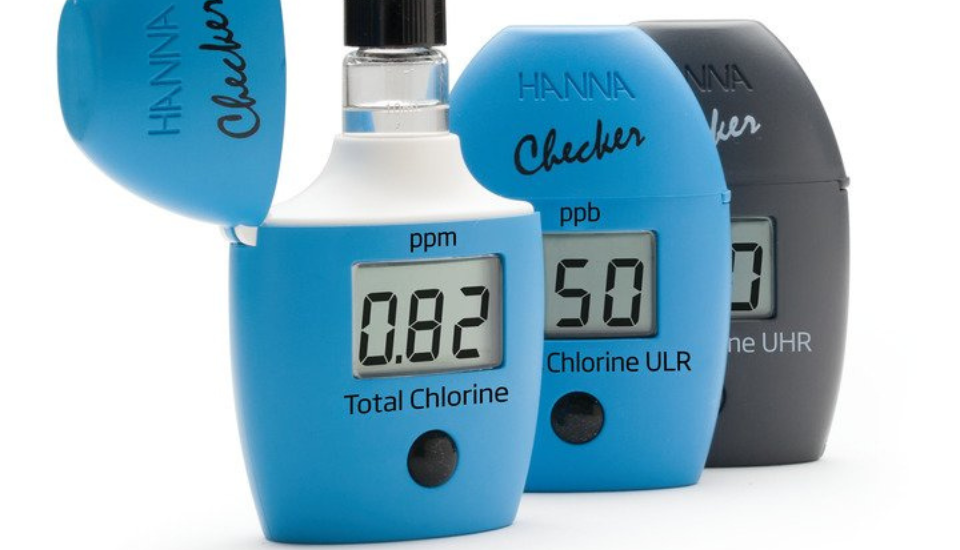
Hanna Instruments Handheld Colourimeter Checker® HC products offer an unrivaled blend of accuracy, quality, and affordability.
While the Checkers are very easy to use – like any scientific instrument, small errors can adversely affect your readings.
Follow these best practices when using a Checker to ensure you get the most accurate results while saving yourself time and frustration.
Why: Products in the Hanna Checker line are colorimeters, which means they use a light source – such as an LED or tungsten lamp – with a filter and a light sensing detector to determine absorbance and ion concentration. Since the Checkers are an optical-based measurement it’s important that the light is not impeded by fingerprints, scratches, dirt, or air bubbles on your cuvettes.
Fix: Use a microfiber cloth to wipe the outside of the cuvette. To remove air bubbles, gently tap the cuvette before placing it inside the Checker.
Why: Using the same syringe or pipette tip for both salt and freshwater can contaminate your freshwater sample, which leads to inaccuracies since some salt may be left inside the pipette.
Fix: Label each syringe and pipette tip as either freshwater or saltwater so they don’t get mixed up.
Why: When using a Checker, it’s important that the length of the optical path is always the same to ensure consistent and accurate readings every time.
Fix: Place a small mark on the cap or top of the glass to help index the position of the cuvette in the device.
Why: Letting a sample mixed with reagents sit in the cuvette for too long can stain the glass. This will affect the absorbance as the light passes through the glass, resulting in a bad reading.
Fix: Always empty and rinse cuvettes after testing. This brings us to our next point…
Why: Cuvettes need to be free of possible contaminants before a new test is performed. Rinsing them with aquarium water can leave behind residual material after testing. The cuvettes should also be completely air-dried after rinsing to prevent any unwanted dilution of the sample when performing your next test.
Fix: Always empty and rinse cuvettes with distilled or DI (deionized) water after testing. When placing the cuvettes back in the case, leave the caps off.
Why: Using an expired reagent can give inaccurate or false readings.
Fix: Make a habit to examine reagent bottles or sachets before use. For best results, make sure you’re storing reagents in a cool, dry place and avoid dramatic temperature changes. Dramatic temperatures and humidity can damage the reagents.
Why: Any alternative light source entering the checker can cause inaccurate or false readings. The checker is designed to use a fixed light source – such as an LED or tungsten lamp – with a filter and a light-sensing detector to determine absorbance and ion concentration.
Fix: Make sure the checker hood is pushed down completely so that additional outside light cannot penetrate the cuvette.
Why: Cutting the packet along the bottom right corner towards the top left will create a funnel to allow easier pouring of the reagent into the cuvette. No reagent spilling means better testing results!
Fix: Before cutting the packet, gently tap it to make sure the reagent is not stuck in the corner you are cutting. Then use scissors to cut along the dotted line.

Why: When you are not sure what readings to expect from a new sample type or when getting unusual readings, it’s important to validate the Checker’s factory calibration.
Fix: Checker Calibration Sets have a known concentration of the parameter being measured and allow you to quickly confirm that the checker is working correctly.
These high-quality standards come with a Certificate of Analysis which includes the lot number, reference values, and expiration date to provide traceability when certifying the Checker.
Environmental Monitoring of Nitrates and Other Water Quality Parameters: pH,...
Salt Concentration In A Brine Solution For Curing Salmon Traditionally,...

To empower customers to achieve quality by supplying intuitive, accurate, and reliable analytical instruments with exceptional customer service and value.
We take pride in every product we build. From an original idea to a completed product ready for testing. We oversee every aspect of the manufacturing process. It is this level of attention to detail that sets us apart.
To empower customers to achieve quality by supplying intuitive, accurate, and reliable analytical instruments with exceptional customer service and value.
We take pride in every product we build. From an original idea, to a completed product ready for testing. We oversee every aspect of the manufacturing process. It is this level of attention to detail that sets us apart.

