Turbidity Meter Calibration: A Step-by-Step Guide Turbidity meters are essential tools for monitoring water quality in various industries, including environmental monitoring, wastewater treatment, food, and beverage. These meters measure turbidity for drinking and surface water. Calibration ensures the accuracy of turbidity measurements, providing reliable data for quality control. Here’s a step-by-step guide on how to calibrate your portable or benchtop turbidity meter effectively. Step 1: Prepare the Equipment Gather all the necessary equipment for calibration: Turbidity calibration standard solutions Cleaning solutions Clean, lint-free cloth Distilled water Calibration cuvettes Gloves Step 2: Clean the Meter Proper cleaning is crucial to remove any residue or contaminants that could affect the accuracy of the measurements. Use a clean, lint-free cloth moistened with cleaning solutions to wipe the optical surfaces of the meter carefully. Step 3: Prepare Calibration Standards Ensure that the calibration standards are within their expiration date and properly mixed before use. Follow the manufacturer’s instructions for dilution if necessary. It is recommended that the turbidity value of the prepared calibration solutions to be close to the default calibration points. Warning: Handle hydrazine sulfate with care because it is a carcinogen reagent. Avoid inhalation, ingestion, or skin contact. Formazin solution can also contain some hydrazine traces. Step 4: Zero Calibration Zero calibration establishes the baseline reading when there is no turbidity in the sample. Place a clean cuvette filled with distilled water into the meter and adjust the instrument to read zero. Step 5: Calibration with Standards Low-Level Calibration: Insert the cuvette containing the low-level turbidity standard into the meter. Allow the reading to stabilize, then adjust the meter to the known turbidity value of the standard. High-Level Calibration: Repeat the process with the high-level turbidity standard. Insert the cuvette containing the high-level standard and adjust the meter to the known value. For best results, the measurement techniques must be followed during calibration. If formazin standards are used, mix the cuvettes gently for about 1 minute and then allow the standard to settle for 1 more minute before calibration. Calibration can be performed in two, three four or five points. Calibration of the turbidity range will not affect the free or total chlorine measurements. Before making the calibration, be sure that you are in the correct range. Step 6: Verification After calibration, it’s essential to verify the accuracy of the measurements. Use a different instrument or test the samples in a laboratory for comparison. If there are discrepancies, recalibrate the turbidity meter and verify again until the readings are consistent. Step 7: Documentation Document the calibration process, including the date, standards used, and any adjustments made. Keep records of calibration for regulatory compliance and quality assurance purposes. Step 8: Routine Maintenance Regular maintenance is the key to keeping your turbidity meter in optimal condition. Clean the instrument after each use and follow the manufacturer’s recommendations for calibration frequency and any other maintenance procedures. Discover our range of Portable and Benchtop Turbidimeters Benchtop Turbidimeters Portable Turbidimeters Order online Order online Related posts The Ultimate Guide to Pool Water Testing The Ultimate Guide to Pool Water Testing Discover the key pool water parameters every pool owner should test for. One… Read more Benefits of Portable Multiparameter Devices for Water Quality Testing and Their Environmental Impact Benefits of Portable Multiparameter Devices for Water Quality Testing and Their Environmental Impact Water quality is a critical aspect of… Read more Importance of checking water parameters in wastewater Importance of checking water parameters in wastewater Water parameters in wastewater play a crucial role in ensuring environmental sustainability, community… Read more Subscribe to our newsletter

Measuring pH in Acidified Foods Find out all you need to know about measuring pH in acidified foods. To succeed in creating high-quality foods, pH analysis should be at the heart of your strategy. Quantitative analysis needs to be a driving force behind decision-making for food formulations, quality control, and food safety. Analytical testing can easily be integrated into the food production process. From hobbyists to food scientists, many involved in food quality and safety now use a variety of analytical testing techniques to create stable, safe, and most of all, great-tasting foods. Analyzing data is of no use unless the data represents the actual condition of the food. The quality of analytical data depends on proper sampling, appropriate method selection, and effective measurement techniques. This article will discuss how to utilize pH testing to ensure food quality and safety. It will cover how pH affects food quality, as well as the necessary tools and suggested measurement procedures, which will be highlighted for liquid, semisolid, and solid food samples. How does pH affect food quality? pH plays a crucial role in determining the quality of food by influencing its taste, texture, color, and shelf life. Thus, maintaining the appropriate pH level is critical for preserving food quality and safety. Flavor: Organic acids, such as citric acid, can provide a tart or sour flavor to foods. Fermentation: pH affects bacteria used in food production to make cheese, yogurt, vinegar, and soy sauce, to name just a few. Yeast performs best at a pH of 4.5-6.0. Texture: Texture is particularly susceptible to pH changes. Low pH will result in a cheese without shape or hold while high pH causes cheese to crumble. Appearance: pH plays a role in haze formation and contributes to pigment. Anthocyanins, the red pigments found in berries, turn blue, green, or yellow in alkaline conditions. Shelf stability: pH prevents spoilage by inhibiting bacterial growth. Bacteria, such as E.coli, require a pH higher than 4.6 to thrive; anything lower will inhibit growth. How to prepare samples? Preparing food samples for pH testing involves several steps to ensure accurate and reliable results: – Choose representative samples that accurately reflect the composition and characteristics of the food product. Ensure the samples are homogeneous and free from any contaminants. – Direct insertion into liquid samples. – Solids and semisolids should be processed as a paste of uniform consistency. – Oil layers may be discarded to reduce clogging. What do you need to measure pH accurately and efficiently? pH Meter: The pH meter must have a minimum 2-point calibration, automatic temperature compensation, 0.01 pH resolution, and a mV scale pH electrode Calibration solutions: The calibration buffers used should bracket the expected sample pH. Generally, pH 4.01 and 7.01 buffers will bracket most food samples. Cleaning solutions: Contamination on the glass sensing surface and clogged junctions are two of the most common reasons for poor electrode performance. In foods, this is particularly common because fat and protein residues can easily coat the electrode and clog the junction of the pH electrode. Storage solutions: A dry pH electrode can contribute to poor performance. A pH electrode will display one pH value when dry and a different value when hydrated. Every glass pH electrode will form a hydrated layer on the glass. It takes around 3-4 hours for the hydration layer to completely form. A storage solution is designed to keep the electrode bulb hydrated. Storage solutions are also formulated to prevent organic growth which can coat the electrode bulb. Fill solutions: The filling solution of a pH electrode diffuses slowly from the inside of the pH electrode, losing anywhere from 15 – 45 μL/hour (0.33 to 1 drops/hour). The fill solution must be topped off to maintain a proper level. By having these tools and following proper procedures, you can measure pH accurately and efficiently, providing valuable insights into the quality and characteristics of various food samples. An ideal pH meter for testing should have the following characteristics: Accuracy: Provides precise pH measurements within a narrow margin of error, ensuring reliable results. Speed: Offers fast response times, allowing for efficient testing without unnecessary delays. Flexibility: Today’s meters offer a wider range of flexibility. A portable meter offers the ability of in-field use with the performance of a benchtop. Ease of use: Measurement, configuration, calibration, and logging should be easy to do with data management features including direct / USB data transfer. Simple maintenance: Advanced pH meters have diagnostics capability to inform of problems during the calibration process. Diagnostic messages should include the overall probe condition and whether the probe should be cleaned, or if the buffer is contaminated. With these characteristics, an ideal pH meter simplifies the testing process while delivering accurate and reliable pH measurements for various applications. Discover our comprehensive solution tailored to meet measuring pH in acidified foods The HI98161 is a professional portable pH and temperature meter with a probe designed specifically for pH measurement in the food sector. The HI98161 is supplied with all necessary accessories to perform a pH/temperature measurement packaged into a durable thermoformed carrying case that holds the meters, probes and calibration buffers securely in place. Related posts Understanding How Digital Refractometers Work Understanding How Digital Refractometers Work Digital refractometers are essential tools in various industries, from food and beverage to pharmaceuticals and… Read more The power of refractometers in the food industry Enhancing accuracy and efficiency: The power of refractometers in the food industry Refractometers are commonly used in the food industry… Read more Identify Rancid Food by Testing for Peroxide Value Identify Rancid Food by Testing for Peroxide Value Is Your Food Safe To Eat? Every food you purchase comes with… Read more Subscribe to our newsletter
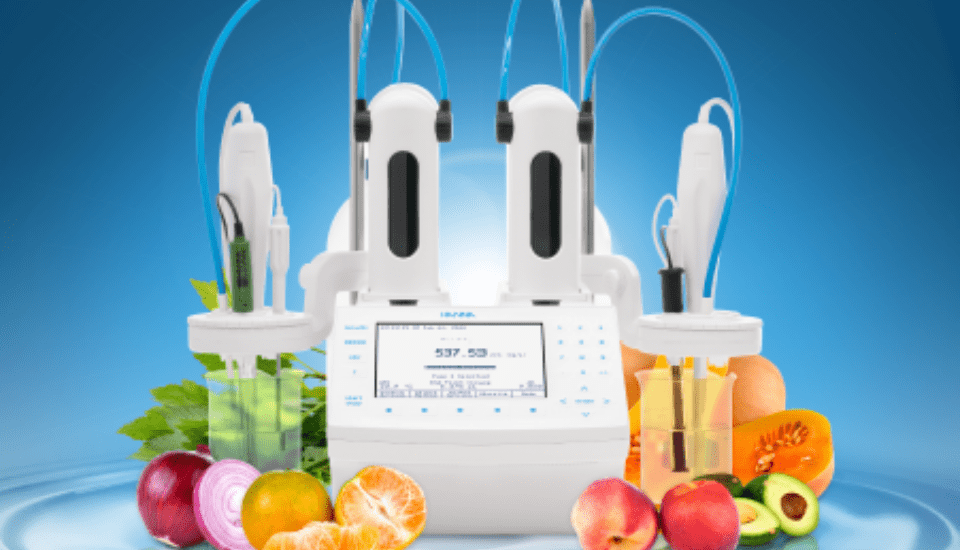
Titration Guide Book Are you ready to automate your testing processes? Automatic titrators are indispensable for meeting quality standards and are designed to withstand the rigorous demands of various testing environments. Our Automatic Titrators are dependable and up for the task! Whether you are just starting out with an Automatic Titrator or you already use titrators in your lab and are looking to upgrade, we are here for you. At Hanna, we work with you every step of the way to ensure your testing success. Take your Lab to the Next Level: With cutting-edge features packed into a compact design, these titrators are just what you need to get the job done! Small Footprint: We understand that in a busy lab, space is valuable. With this in mind, we designed these titrators to have a 50% smaller footprint allowing for easy integration. Use the space you save to fully optimize your benchtop and increase productivity. User-Friendly: Titrate for a variety of published methods at the push of a button. Virtual keys on the display allow users to easily navigate between screens and menus. Accurate and Repeatable Results: In a busy lab, there can be multiple shift changes throughout the course of a day. Since the control parameters with our Automatic Titrators are preprogrammed, every lab technician can follow the same steps. This ensures accurate, consistent, and repeatable results independent of the operator. Reduced Titrant and Sample Usage: Our Automatic Titrators can significantly reduce titrant consumption without compromising the accuracy of your data. Due to high dosing precision, titrations require smaller sample sizes so less titrant is used. Minimize waste and cut costs by reducing chemical and sample usage. Time Savings and Increased Productivity: Operators are less involved in the titration process with Automatic Titrators. Once the sample is prepared, you press the start button, and the titration progresses automatically. This allows you to perform other job functions simultaneously. Adding an Automatic Titrator to your lab will save you time and increase lab efficiency. Top Notch Performance: These titrators are built with an unmatched 40,000-step dosing pump that is capable of dosing extremely small volumes of titrant so you can achieve a very precise endpoint. Customizable Methods: Store up to 100 user-defined or standard titration methods. Each method can be modified and optimized for performance based on your application and requirements. Durable and Built to Test: Equipped with a Cycology® body that is both heat and stain resistant. Flexible Electrode Holder: This can hold up to 3 electrodes, 4 tubes, and 1 temperature probe. Use electrodes with different diameters simply by changing the electrode guide. Create the best tube alignment for your titration with a rotating holder. Adjustable Arm: This provides you versatility in the lab. The electrode holder is built directly into the titrator unit, and the press-to-release button allows for simple height control. Smart Stirrer: The removable overhead stirrer uses built-in speed control for more consistent stirring. Exchangeable Burette System: With Hanna’s Clip-Lock™ burette feature, it only takes a few seconds to exchange titrants and reagents preventing cross-contamination. You will hear an audible clicking sound ensuring that the Clip-Lock is securely in place. Stay Connected: You can connect devices such as an analytical balance for automatic weight sample entry or a printer to print reports directly from the titrator Get the Support You Need with Hanna!From titrator selection to onsite installation, training, repairs, and preventative maintenance, our team of experts are here to assist you with your testing needs. We offer various service plans to keep your titrators running at optimal performance and to ensure the longevity of your equipment. Discover our comprehensive solution tailored to meet all your automatic titration requirements. The HI932 Automatic Titrator is the answer to your dedicated titration needs. Fully customizable, the HI932 delivers accurate results and intuitive user experience, all in a compact package. Titrate for a variety of measurements at the push of a button including acids, bases, redox, and selective ions. No additional programming upgrades to purchase. The only things you need to start using the HI932 are a sensor and titrant. Related posts Analytical Wine Testing for Winemakers Analytical Wine Testing for Winemakers Organising and planning the winemaking process is as important as the planting and picking of… Read more Guide to Chemical Oxygen Demand (COD) Testing Guide to Chemical Oxygen Demand (COD) Testing Chemical oxygen demand (COD) is a critical waste treatment measurement in everything from municipal systems… Read more Measuring Acidity of Natural Water by Titration Measuring Acidity of Natural Water by Titration In the past 75 years, the worldwide human population has increased from approximately… Read more Subscribe to our newsletter
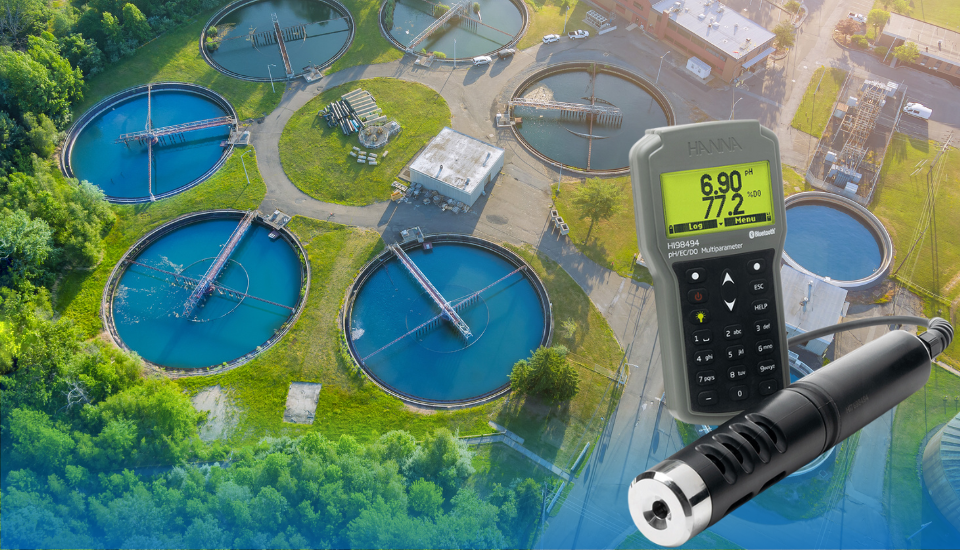
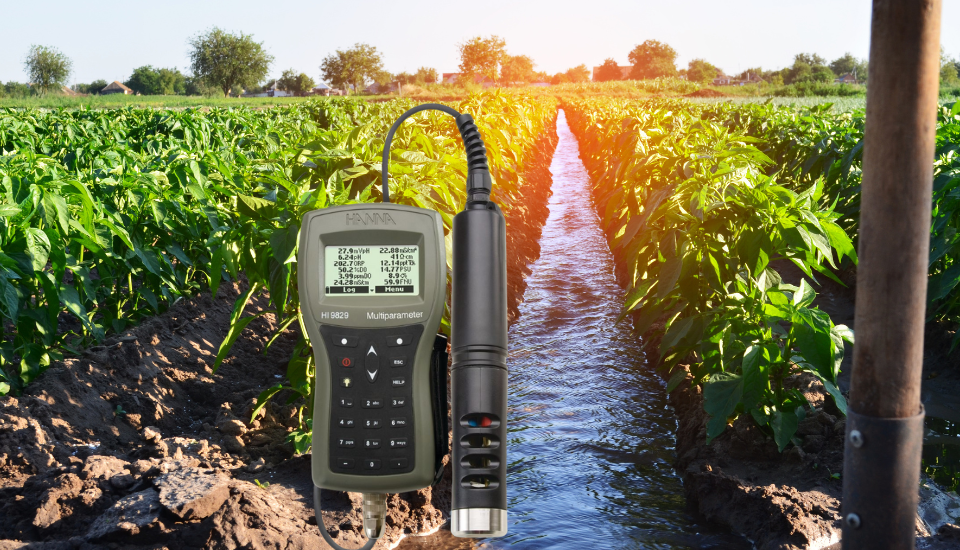
Importance of checking water parameters in wastewater Water parameters in wastewater play a crucial role in ensuring environmental sustainability, community health, and regulatory compliance. Monitoring and analysing wastewater parameters provide valuable insights into the quality of wastewater and its potential impact on environment. Measuring precise parameters in wastewater play pivotal role in water industries. In this article we are highlighting the importance of checking water parameters in wastewater: 1. Environmental impact: Wastewater often contains various pollutants, including metals, nutrients, and organic compounds. Monitoring of water parameters allows the identification of these pollutants, enabling us to implement measures to reduce or eliminate their release. This, in turn, protects and maintains the overall health of water bodies. 2. Community Health: Wastewater can carry harmful contaminants that pose a risk to public health. By checking water parameters, particularly indicators of microbial contamination, we can detect and address potential threats to human health. This is important for preventing the spread of waterborne diseases and ensuring the public safety. 3. Regulatory Compliance: Governments and environmental agencies set water quality standards and regulations to protect natural water bodies and public health. Monitoring of water parameters is essential for industries and wastewater treatment facilities to ensure compliance with these standards. Failure to meet regulatory requirements may result in penalties and legal consequences. 4. Efficient Wastewater Treatment: Understanding the composition of wastewater through the analysis of water parameters is essential for the effective treatment processes. By measuring the amounts of pollutants, treatment plants and water industries can optimize their operations, select appropriate treatment methods, and achieve better overall efficiency in removing contaminants from wastewater before discharge. 5. Resource Conservation: Wastewater may contain valuable resources such as nutrients and energy. Monitoring water parameters allows for the identification of these resources, enabling their recovery and reuse. This not only contributes to sustainability but also reduces the environmental impact. Checking water parameters in wastewater is critical for maintaining environmental health, safeguarding public health, and ensuring sustainable water management practices. This comprehensive monitoring process contributes to a cleaner and safer environment for current and future generations. Our solution to checking water parameters Our Waterproof Multiparameter excels in identifying essential water parameters, including pH, ORP, conductivity, dissolved oxygen, turbidity, ammonium, chloride, nitrate, and temperature. Its robust waterproof design and portability make it the preferred testing tool within the water industry. Related posts The Ultimate Guide to Pool Water Testing The Ultimate Guide to Pool Water Testing Discover the key pool water parameters every pool owner should test for. One… Read more How to Use a pH Meter for Water Testing How to Use a pH Meter for Water Testing Maintaining the right pH level in water is crucial for various… Read more Monitoring Water Quality – Disinfection Monitoring Water Quality – Disinfection Part 1. Disinfection Properties of water bodies vary based on natural factors such as landscape… Read more Subscribe to our newsletter
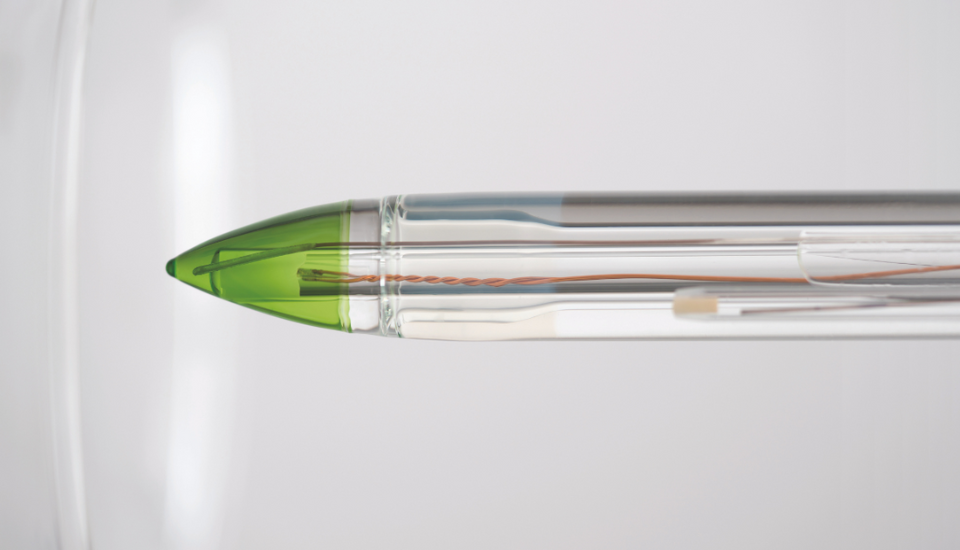
Calibrating your pH electrodes When it comes to pH measurement, precision is crucial. pH meters are indispensable tools in numerous fields, enabling accurate acidity and alkalinity assessments. To ensure reliable and consistent pH readings, regular calibration of pH meters is important because of how the electrode changes over time. The importance of calibration Calibration serves as a fundamental aspect of pH meter maintenance. Over time, pH meters can experience drift due to factors such as electrode aging, temperature fluctuations, or exposure to chemicals. Calibration enables adjustments to be made, aligning the pH meter’s readings with known reference standards. This process ensures accurate and dependable pH measurements, instilling confidence in the results obtained. The Calibration process Preparing the pH electrode First remove the protective cover from the electrode bulb and rinse the bulb in de-ionised (DI) water to remove any salt crystals. After rinsing, remove any excess DI water by shaking down the electrode (do not wipe the sensing tip!). Refill your electrolyte if needed. You’re now ready to calibrate. Note: the formation of salt crystals on your pH electrode is normal. It happens when the storage solution evaporates during shipment or over a long period of unuse. Preparing the calibration solutions Choose two or more calibration solutions with known pH values. These solutions should cover the pH range relevant to the samples being tested. As an example, you could use pH buffers 1.00 and 4.01 for a two-point calibration to measure the pH of lemon juice (which has a pH around 2). Remember to always use fresh solutions and replace them if they become contaminated. Maintaining pH Calibration Solutions Never submerge your electrode right into the calibration solution bottle. Pour out just what is needed into a container that has been rinsed with DI water and use that for your calibration. Discard used calibration solutions. Hanna calibration buffers are designed to have a long shelf life when left unopened. Once opened, a buffer with a pH lower than 7 will last around 4-8 weeks, while a buffer with a pH over 7 will be good for about 1-2 weeks. For even better accuracy, you can perform a third calibration at pH 7.01. Calibrating at pH 7.01 can determine problems such as a contaminated or broken probe and helps avoid any errors in measurement. It’s best to calibrate daily for high accuracy. However, calibrating once or twice a week is fine too if you don’t require highly accurate measurements. If you decide to do the latter, we recommend using the single-use sachets, instead of the bottle. Shelf-life is limited after bottles are opened, whilst the sachets can last longer. Performing pH meter calibration Start by rinsing the electrode in DI water and stir the electrode gently for 4-6 seconds. Then place the electrode in your first calibration solution, carefully submerged the sensing tip and junction and stir gently. If you use magnetic stirrer, ensure that vortex is not forming. Wait for the reading to stabilize for at least 3 seconds and confirm the calibration. Repeat this process as needed for your other calibration solutions. Now you’re ready to take your measurements and be confident in their accuracy. Optional: Check your Good Laboratory Practice (GLP) Data Many Hanna meters have a GLP data screen that allows you to verify that the electrode’s calibration data is acceptable for use in measurement. This data includes the slope and offset of the electrode (the Nernst equation) The slope should be between 85-105% (51-62 mV/pH unit) and the offset should be between ±30mV. If your electrode is outside of this range, try cleaning, reconditioning and calibrating with fresh buffer. If the problem persists, you may need to replace your electrode. Using storage solutions If your electrode is dry, rehydrate the sensing tip by soaking the bulb and junction in an electrode storage solution for at least one hour or more. Storing your electrode in storage solution also improves its life span and performance. Storing your pH electrode in storage solution rather than water is important for reducing microbial growth, preventing the reference electrolyte from leaching out, and keeping the junction clear. If you’re out of storage solution, pH 4 or 7 buffers can be used in a pinch. Cleaning and storing your pH electrode Soak the electrode in a general cleaning solution, or an appropriate use-specific cleaning solution, for at least 15 minutes before calibration to dissolve contamination. Never store pH electrodes in distilled or deionized water. Doing so will shorten the life of the sensor. When possible, we strongly suggest using a cleaning solution specially designed for what you are testing. Each dedicated cleaning solution is made to effectively remove the specific types of stains and deposits from your sample. (For example, the cleaning solution for soil tester will remove the dirt and organic matters that can get stuck on the electrodes.) After cleaning, rinse the pH electrode thoroughly with distilled or DI water, and then soak the electrode in storage solution for at least 2-3 hours before calibration. We recommend soaking the electrode overnight for best results. Get your complete set of solutions from Hanna Instruments Australia. (What’s included: pH 4.01, 7.01 and 10.01 technical calibration solutions, storage solution and cleaning solution). Related posts Enhancing Bread Shelf Life by Measuring the pH of Bread Dough Enhancing Bread Shelf Life by Measuring the pH of Bread Dough Bread is a staple in the diet of most… Read more How to Clean a pH Meter Probe How to Clean a pH Meter Probe Maintaining the accuracy and longevity of your pH meter probe is crucial for… Read more Turbidity Meter Calibration: A Step-by-Step Guide Turbidity Meter Calibration: A Step-by-Step Guide Turbidity meters are essential tools for monitoring water quality in various industries, including environmental… Read more Subscribe to our newsletter

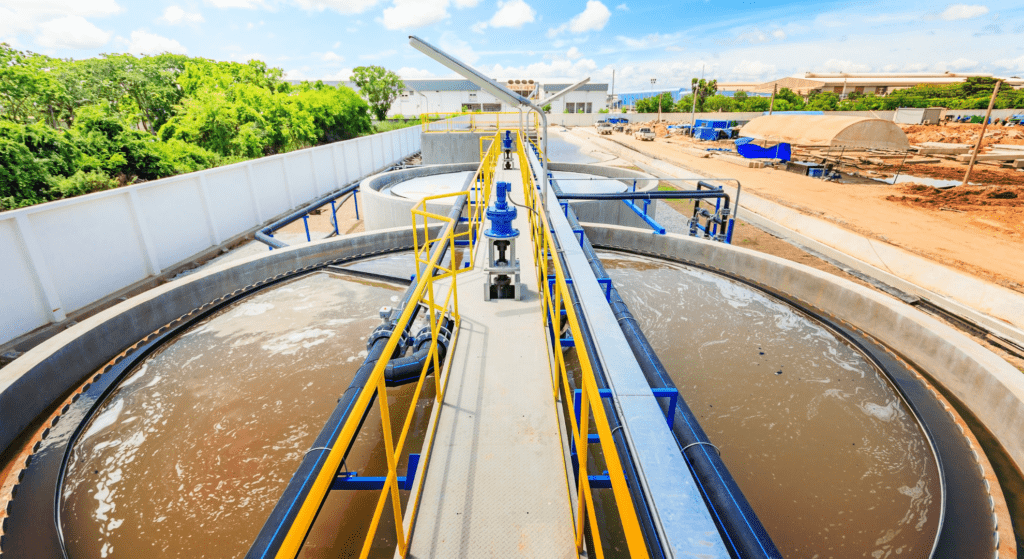
Transforming effluent into sustainability: Protecting communities and preserving the environment Wastewater treatment plays a pivotal role in preserving the environment and safeguarding public health. As industrial and population growth continue to increase the volume of wastewater generated, effective treatment methods are crucial to mitigate environmental impact. We will explore the importance of wastewater treatment, its significance in public health and the various methods employed to treat wastewater. Wastewater, generated from residential, commercial, industrial and agricultural activities contains a wide range of contaminants. If left untreated, it can pose significant health risks to the public and the environment. Proper wastewater treatment is essential for several reasons: Why wastewater treatment matters Public health Wastewater often contains harmful pathogens, bacteria and viruses that can cause waterborne diseases. By treating wastewater, these pathogens are removed, preventing the spread of illnesses and protecting public health. Environmental protection Untreated wastewater discharged into water bodies can lead to water pollution, harming aquatic ecosystems and compromising the biodiversity of rivers, lakes and oceans. Effective treatment processes remove pollutants, minimising the environmental impact and maintaining ecological balance. Resource conservation Wastewater contains valuable resources such as water, energy and nutrients. Treating and recycling wastewater allows for the conservation of these resources, reducing the strain on freshwater supplies and promoting sustainable practices. Wastewater Treatment Methods Wastewater treatment involves several stages to ensure its safe disposal or reuse: Preliminary Treatment The initial stage involves the removal of large objects and debris through screening and sedimentation. This process prevents damage to downstream equipment and ensures the smooth flow of wastewater. Primary Treatment In this phase, physical processes such as sedimentation and flotation are employed to remove suspended solids and organic matter. Gravity settles the solid particles, forming sludge, while the relatively clear liquid proceeds to secondary treatment. Secondary Treatment Also known as biological treatment, this stage uses biological processes to further break down organic matter. Aerobic and anaerobic processes, such as activated sludge, trickling filters, and lagoons, facilitate the decomposition of organic substances, converting them into harmless byproducts. Tertiary Treatment If higher water quality standards are required, tertiary treatment is employed. This phase uses advanced filtration technologies like sand filters, membranes, or chemical processes such as coagulation and disinfection to remove remaining suspended solids, nutrients, and pathogens. Sludge Treatment Sludge produced during the treatment process undergoes separate treatment. Techniques such as digestion, dewatering, and drying are employed to reduce the volume and stabilize the sludge, facilitating safe disposal or beneficial reuse. Advanced Wastewater Treatment Technologies As technology advances, innovative approaches are being utilized to improve wastewater treatment efficiency and resource recovery. Some notable advancements include: Membrane Filtration Membrane-based technologies, including microfiltration, ultrafiltration, nanofiltration, and reverse osmosis, offer enhanced filtration and separation capabilities, effectively removing particles, microorganisms, and dissolved contaminants. Biological Nutrient Removal (BNR) BNR processes combine nitrogen and phosphorus removal with traditional biological treatment. These processes optimize nutrient removal, minimizing the discharge of these pollutants into water bodies and reducing the risk of eutrophication. Resource Recovery Advanced treatment techniques allow for the recovery of resources from wastewater. These include the extraction of energy through anaerobic digestion or the recovery of nutrients like phosphorus and nitrogen for use as fertilisers. Wastewater treatment is a crucial process that protects public health, preserves the environment, and promotes sustainability. By effectively treating and managing wastewater, we can prevent waterborne diseases, minimize water pollution, and conserve At Hanna Instruments, we can supply you with reliable equipment for effective wastewater treatment: BlackStone Series dosing pumps use a minimum number of moving parts, therefore reducing the chance of mechanical failure. Part wear and oiling associated with motor driven pumps (ball-bearings, gear drives and cams) are not a concern with these pumps. A wide range of BlackStone pumps with different dosing capacities are available for your specific dosing needs The pumps have been designed to meet the ever changing needs of the industry. HI9829 waterproof multiparameter is a portable logging multiparameter tool that monitors up to 14 different water quality parameters. The microprocessor based multi-sensor probe allows for the measurement of key parameters including pH, ORP, conductivity, dissolved oxygen, turbidity, ammonium, chloride, nitrate and temperature. Related posts Benefits of Portable Multiparameter Devices for Water Quality Testing and Their Environmental Impact Benefits of Portable Multiparameter Devices for Water Quality Testing and Their Environmental Impact Water quality is a critical aspect of… Read more The role of free chlorine in keeping drinking water safe The role of free chlorine in keeping drinking water safe Clean drinking water is essential to human urvival. To make… Read more Environmental Monitoring of Nitrates and Other Water Quality Parameters: pH, Dissolved Oxygen (DO), Turbidity Environmental Monitoring of Nitrates and Other Water Quality Parameters: pH, Dissolved Oxygen (DO), Turbidity Nitrate is one of the most… Read more Subscribe to our newsletter

Enhancing accuracy and efficiency: The power of refractometers in the food industry Refractometers are commonly used in the food industry and their popularity stems from their pivotal role in maintaining precision and product quality. In the fast-paced and precise world of the food industry, ensuring accurate measurements and maintaining product quality are paramount. One indispensable tool that plays a crucial role in achieving these goals is the refractometer. With its ability to measure the concentration of sugars and other solutes in food, the refractometer is an asset for manufacturers and quality control professionals. We will explore why the refractometers in the food industry are important. Precise sugar analysis Sugar content is a critical parameter in many food and beverage products, including juices, jams, syrups, and confectionaries. Refractometers enable precise sugar analysis by measuring the refractive index of a sample, which is directly proportional to its sugar concentration. With the H196804 Digital Refractometer, food industry professionals can accurately determine invert sugar content, ensuring consistency in taste, texture, and sweetness of their products. Quality control and process optimisation Maintaining struct quality is essential in the food industry to ensure that products meet regulatory standards and consumer expectations. Refractometers provide a rapid and non-destructive method for assessing the quality and authenticity of food samples. By measuring parameters such as sugar concentration, refractometers enable manufacturers to monitor the consistency of their products during various stages of production. This information empowers them to make real time adjustments, optimise processes and ensure that each batch meets the desired specifications. Time and cost savings In the fast –paced food industry, time is of the essence. Traditional laboratory methods for sugar analysis often require time-consuming sample preparation and complex procedures. Refractometers streamline the analysis process by providing immediate results with minimal sample preparation. The HI96804 Digital Refractometer offers a user-friendly interface and automated temperature compensation, saving valuable time in the measurement process. Moreover, by reducing the need for costly and time-intensive laboratory equipment, refractometers contribute to overall cost savings for food industry professionals. Versatility and adaptability One of the significant advantages of refractometers in their versatility across a wide range of food applications. From measuring sugar content in fruit juices to assessing the concentration of sweeteners in beverages, refractometers can handle diverse samples. The HI96804 Digital refractometers is designed for invert sugar measurement, demonstrating the adaptability of refractometers in catering to specific needs within the food industry. This flexibility makes refractometers an invaluable tool for quality control professionals in various sectors, including food processing, beverage production and confectionary manufacturing. Refractometers have revolutionised the food industry by providing accurate and efficient sugar analysis, facilitating quality control, and saving time and costs. Our HI96804 Digital refractometer exemplifies the capabilities of refractometers in meeting the demanding needs of the food industry. By incorporating this advanced technology into their processes, food manufacturers and quality control professionals can ensure consistent product quality, optimise production processes, and maintain their competitive edge in a dynamic market. Our refractometers are easy to use with technology that enables fast readings and consistent results. Better yet, it can be used for various industries. Related posts Understanding How Digital Refractometers Work Understanding How Digital Refractometers Work Digital refractometers are essential tools in various industries, from food and beverage to pharmaceuticals and… Read more Measuring pH in Acidified Foods Measuring pH in Acidified Foods Find out all you need to know about measuring pH in acidified foods. To succeed… Read more Titration Guide Book Titration Guide Book Are you ready to automate your testing processes? Automatic titrators are indispensable for meeting quality standards and… Read more Subscribe to our newsletter

The role of free chlorine in keeping drinking water safe Clean drinking water is essential to human urvival. To make sure the water we drink is free from harmful contaminants, water treatment facilities use different methods to purify it. One of the most common methods is chlorine treatment, particularly the use of free chlorine. In this article, we’ll discuss how free chlorine helps keep drinking water safe. What is Free Chlorine? Chlorine is a potent disinfectant used to kill bacteria and viruses in drinking water. Free chlorine, also known as residual chlorine, is the amount of chlorine remaining in water after treatment. Free Chlorine’s Role in Drinking Water Treatment Free chlorine plays a crucial role in drinking water treatment. Its primary function is to kill harmful pathogens like bacteria, viruses, and protozoa. When free chlorine is introduced to water, it interacts with contaminants, rendering them harmless and ensuring the water is safe to consume. Free chlorine also prevents the growth of bacteria and viruses in the water distribution system. It has a residual effect, which means it continues to protect against contaminants even after being added to the water. Measuring Free Chlorine Levels To ensure drinking water safety, maintaining the appropriate free chlorine levels is vital. The required amount of free chlorine varies depending on factors such as temperature, pH, and the presence of organic matter in the water. Water treatment facilities measure free chlorine levels using methods such as test strips or chemical analysis. If the levels are too low, additional chlorine is added to ensure safe consumption. In conclusion, free chlorine is a crucial component in ensuring drinking water safety. Its ability to kill pathogens and prevent the growth of bacteria and viruses makes it essential in water treatment. Therefore, maintaining appropriate free chlorine levels is necessary to guarantee safe drinking water. What products can be used to test free chlorine? There are several products available that can be used to test free chlorine levels in water. Here are some common options: Colorimeters: Colorimeters are more accurate than test strips and can measure the exact concentration of free chlorine in water. They work by shining a light through a water sample and measuring the colour intensity. Hanna Instruments has a range of portable colorimeters and professional benchtop colorimeters designed to measure chlorine in body of waters. Comparator Kits: Comparator kits are an inexpensive option that involves comparing the colour of a water sample to a standard colour chart to determine the free chlorine concentration. Digital Testers: Digital testers use an electrode to measure the free chlorine levels in the water. They can be more expensive than other options but provide precise readings and are easy to use. Test strips: Chlorine test strips are simple and affordable. You can dip a strip into a water sample, and the colour of the strip will change based on the level of free chlorine present. It’s important to note that each testing product has its own instructions and limitations, so it’s crucial to follow the manufacturer’s instructions carefully to get accurate results. Additionally, you should consider the type of water being tested, the desired level of accuracy, and the frequency of testing before choosing a product to test free chlorine levels. Related posts Benefits of Portable Multiparameter Devices for Water Quality Testing and Their Environmental Impact Benefits of Portable Multiparameter Devices for Water Quality Testing and Their Environmental Impact Water quality is a critical aspect of… Read more Importance of checking water parameters in wastewater Importance of checking water parameters in wastewater Water parameters in wastewater play a crucial role in ensuring environmental sustainability, community… Read more Monitoring Water Quality – Disinfection Monitoring Water Quality – Disinfection Part 1. Disinfection Properties of water bodies vary based on natural factors such as landscape… Read more Subscribe to our newsletter

Maintaining Healthy Fish and Plants: A Guide to Testing Your Aquarium Water. Aquariums are a great way to bring a bit of life into your home. But, as with any living system, aquariums require regular maintenance to keep them healthy and happy. One of the most important aspects of a thriving aquarium is testing the quality of the water. Testing the water in your aquarium is key to maintaining a healthy environment for your fish and plants. By regularly monitoring the water parameters, you can detect potential issues before they become serious and take the necessary actions to prevent any further harm. The frequency of testing your aquarium water usually depends on the size of your tank, the amount of fish and plants, and the type of filtration system you have. As a general rule of thumb, you should try to test your water around once a week, but more frequent testing is suggested for larger tanks or when introducing new fish or plant life. There are several key parameters you should test for, including pH, ammonia, nitrite, and nitrate. These parameters are important for ensuring that your aquarium is adequately balanced and safe for your fish. The pH level of your aquarium will ideally be between 6.5 and 7.5, which is the perfect range for most freshwater life. If the pH level is too high or too low, it can cause stress to your fish and inhibit plant growth. Ammonia and nitrite are toxic substances that are produced by fish waste and decomposing organic matter in your aquarium. These substances can prove dangerous to your fish and plants if they accumulate to high enough levels. Nitrate is a byproduct of the nitrogen cycle and is not as harmful as ammonia and nitrite, but high levels can still be dangerous to your aquatic pets. To test your aquarium water, you can use a water testing kit that measures the various parameters. Follow the instructions carefully and record the results in a logbook to track any potential changes over time. There are several tools that you can use to test the water in your aquarium, including: 1. Salinity Tester: These have been specifically developed for assessing saltwater aquariums. It is capable of presenting the test results in parts per thousand (ppt), Practical Salinity Units (PSU), or specific gravity (S.G.). With its waterproof design, this tester employs an amperometric conductivity probe to accurately determine the concentration of salt in the water. 2. Liquid Test Kit: These are more accurate than test strips and can give more detailed information about your aquarium’s water quality. You add a few drops of the testing solution to a sample of water and compare the colour to a chart to determine the levels of various parameters. 3. pH Test Kit: This kit is specifically designed to measure the pH level of your aquarium water. It usually also comes with a colour chart that allows you to match the colour of the water sample to the corresponding pH level. 4. Electronic Testers: These are the most advanced tools for testing aquarium water. They use digital sensors to measure the levels of parameters and provide accurate readings quickly. Testing the water in your aquarium is an essential part of maintaining a healthy and thriving environment. By testing your water regularly and monitoring parameters, you can detect and prevent potential problems before they become serious. So, make sure to test your aquarium water and be a responsible aquarium and pet owner. Buy essential checkers for a healthy Aquarium Add to cart All Products Marine Calcium Checker HC Colorimeter – HI758 Rated 0 out of 5(0) $125.40 Add to cart Aquarium Testers Marine Low-Range Nitrite Checker HC – HI767 Rated 0 out of 5(0) $125.40 Add to cart Ammonia Marine Line Ammonia Checker HC – HI784 Rated 0 out of 5(0) $154.00 Add to cart Aquarium Marine Magnesium Checker HC Handheld Colorimeter – HI783 Rated 0 out of 5(0) $154.00 Add to cart Aquarium Marine Nitrate High Range Checker HC – HI782 Rated 0 out of 5(0) $125.40 Add to cart Aquaculture Testers Marine pH Checker HC – HI780 Rated 0 out of 5(0) $125.40 Related posts 9 Best Practices for Using Your Hanna Checker 9 Best Practices for Using Your Hanna Checker Hanna Instruments Handheld Colourimeter Checker® HC products offer an unrivaled blend of accuracy,… Read more Phosphorus in Saltwater Reef Aquariums Phosphorus in Saltwater Reef Aquariums Phosphorus is an essential element for all life forms. While phosphorus is vital for growth… Read more Aquascaping: The Art and Science of Aquariums Aquascaping: The Art and Science of Aquariums The natural world is widely used as a source of inspiration for countless… Read more Subscribe to our newsletter
6 Steps for Taking Care of Your Multiparameter Multiparameter meters are great tools used for measuring different parameters such as pH, conductivity, temperature, and dissolved oxygen levels in water or other liquids. To ensure that your multiparameter meter remains in optimal condition and delivers accurate readings, you need to take proper care of it. Here are 5 steps to consider when caring for your meter. 1. Cleaning It is important that you clean your meter after each use. During use, dirt and debris can build on the meter’s surface, including the electrodes and sensors. To prevent damage and ensure accuracy, you can use a soft cloth or sponge along with the correct solutions to clean your meter properly. Ensure you pay extra close attention to the electrodes and sensors as they are the most important components of your meter. 2. Storage A Good storage solution is crucial to keeping your meter safe and protected. Always store your meter in a clean, dry place when it’s not in use, generally, a hardened protection case is recommended. Make sure it’s kept out of direct sunlight and away from heat, which can damage the meter and cause it to malfunction. 3. Calibration Calibration is an integral part of ensuring the accuracy of your meter readings. You should calibrate your meter regularly, as recommended by Hanna’s guidelines when using our meters, using fresh calibration standards. Calibration is crucial as it helps to ensure that your meter readings stay accurate and reliable and so your meter produces the correct results. 4. Batteries Replacing the batteries should be done on time for the proper functioning of your meter. Check the battery levels regularly and replace them as needed. Using a low battery can cause inaccurate readings, and in some cases can even damage the meter. 5. Care You should try to always handle your meter with the utmost care by avoiding dropping it or exposing it to physical trauma. Mishandling your meter can damage its delicate components, affecting its accuracy and reliability. If you accidentally drop your meter or notice any damage, have it checked by a professional as soon as possible to avoid further damage and false results. Use the correctly specified solutions for each parameter you’re measuring, following the manufacturer’s instructions for preparation and use. Using inappropriate solutions will affect the accuracy of your meter readings and is known to damage the electrodes and sensors. In conclusion, by following these tips, you can ensure the accuracy and reliability of your multiparameter meter and ensure a healthy lifespan. Proper care of your meter should be followed for obtaining accurate readings, increasing the meter’s durability, and reduce the need for frequent maintenance or repair. Related posts Turbidity Meter Calibration: A Step-by-Step Guide Turbidity Meter Calibration: A Step-by-Step Guide Turbidity meters are essential tools for monitoring water quality in various industries, including environmental… Read more Importance of checking water parameters in wastewater Importance of checking water parameters in wastewater Water parameters in wastewater play a crucial role in ensuring environmental sustainability, community… Read more Calibrating your pH electrodes Calibrating your pH electrodes When it comes to pH measurement, precision is crucial. pH meters are indispensable tools in numerous… Read more Subscribe to our newsletter