Hanna Instruments Australia
15% off Easter Sale:  Use code: HOP25
Sales: (03) 9769 0666   |    Mon to Fri: 8:30am – 5:00pm
Hanna Instruments Australia
Sales: (03) 9769 0666   |    Mon to Fri: 8:30am – 5:00pm

How to Test Soil Electrical Conductivity (EC) Using Hanna Soil Testers

Soil electrical conductivity (EC) is a critical measurement for understanding soil health, fertility, and salinity levels. EC testing helps gardeners, farmers, and soil scientists optimize plant growth by ensuring that soil contains the right balance of nutrients. Hanna Instruments offers a range of soil testers that make measuring soil EC accurate and convenient. Here’s a comprehensive guide on how to test soil EC using Hanna soil testers.

Why Measure Soil EC?

Soil EC measures the ability of soil to conduct electrical current, which is directly related to the concentration of soluble salts. High EC levels may indicate excessive salinity, which can hinder plant growth, while low EC levels may suggest nutrient deficiencies. Regular testing helps:

  1. Monitor nutrient levels.
  2. Manage irrigation effectively.
  3. Prevent salinity-related plant stress.
  4. Optimize fertilizer applications.


Tools You’ll Need


Step-by-Step Guide to Testing Soil EC

1. Prepare the Soil Sample

  • Collect a representative soil sample from the area you want to test. Dig about 6 inches deep to gather soil where roots typically grow.
  • Remove debris like rocks and plant material.
  • Mix the soil thoroughly to ensure a uniform sample.

2. Create a Soil Slurry

  • Add a 1:2 ratio of soil to distilled water in a clean container. For example, mix 1 part soil with 2 parts water.
  • Stir the mixture thoroughly and let it sit for about 10 minutes to allow the soluble salts to dissolve into the water.

3. Calibrate the Hanna EC Tester

4. Measure the EC

  • Insert the probe of the Hanna EC tester into the soil slurry. Make sure the probe is fully immersed in the liquid portion of the mixture.
  • Wait for the reading to stabilize. Hanna EC testers typically provide fast, accurate results.

5. Record and Interpret the Results

  • Record the EC value displayed on the meter. EC is usually measured in microsiemens per centimeter (µS/cm) or millisiemens per centimeter (mS/cm).
  • Compare the results with recommended EC levels for your specific crops or soil type. For example:
    • EC < 200 µS/cm: Low salinity, potential nutrient deficiency.
    • EC 200-800 µS/cm: Ideal range for most crops.
    • EC > 800 µS/cm: High salinity, potential plant stress.

6. Clean and Store the Tester

  • After testing, rinse the probe with distilled water to remove soil particles.
  • Dry the probe gently with a soft cloth.
  • Store the EC tester as per the manufacturer’s guidelines to maintain accuracy


Best Practices for Great Results

  • Keep the electrode hydrated
    • Why: Drying out the electrode leads to drifting pH values, slow response times, and incorrect measurements.
    • Fix: “Revive” a dry electrode by submerging the bulb and junction in pH storage solution for at least one hour.
  • Rinse, do not wipe your electrode
    • Why: Wiping the pH glass can produce a static charge which interferes with the pH reading of the electrode.
    • Fix: Simply rinse the electrode with distilled or deionized water (DI). Blot (do not rub) with a lint-free paper towel (e.g. Kimwipes®) to remove excess moisture.
  • Store your electrode in storage solution
    • Why: Storing in deionized water (DI) causes ions to leach from the glass membrane and reference electrolyte resulting in a slow and sluggish response.
    • Fix: Store your electrode in storage solution.
  • Clean your electrode regularly
    • Why: Deposits can form on the electrode during use, coating the sensing glass. This can lead to erroneous calibrations and readings.
    • Fix: Clean the electrode using a specially formulated cleaning solution for pH electrodes- ideally one that’s developed for your application.
  • Calibrate often
    • Why: All pH electrodes need to be calibrated often for best accuracy.
    • Fix: The frequency of calibration depends on how accurate you want to be – daily calibration is ideal.

Related posts

How to Clean a pH Meter Probe

How to Clean a pH Meter Probe

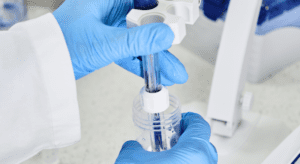
How to Clean a pH Meter Probe Maintaining the accuracy and longevity of your pH meter probe is crucial for…

Using the Hanna Backpack Lab Soil Quality Educational Test Kit in Teaching Environmental Science

Using the Hanna Backpack Lab Soil Quality Educational Test Kit in Teaching Environmental Science

Using the Hanna Backpack Lab Soil Quality Educational Test Kit in Teaching Environmental Science The importance of soil in our…

How to Test pH in Soil: The Complete Guide

How to Test pH in Soil: The Complete Guide

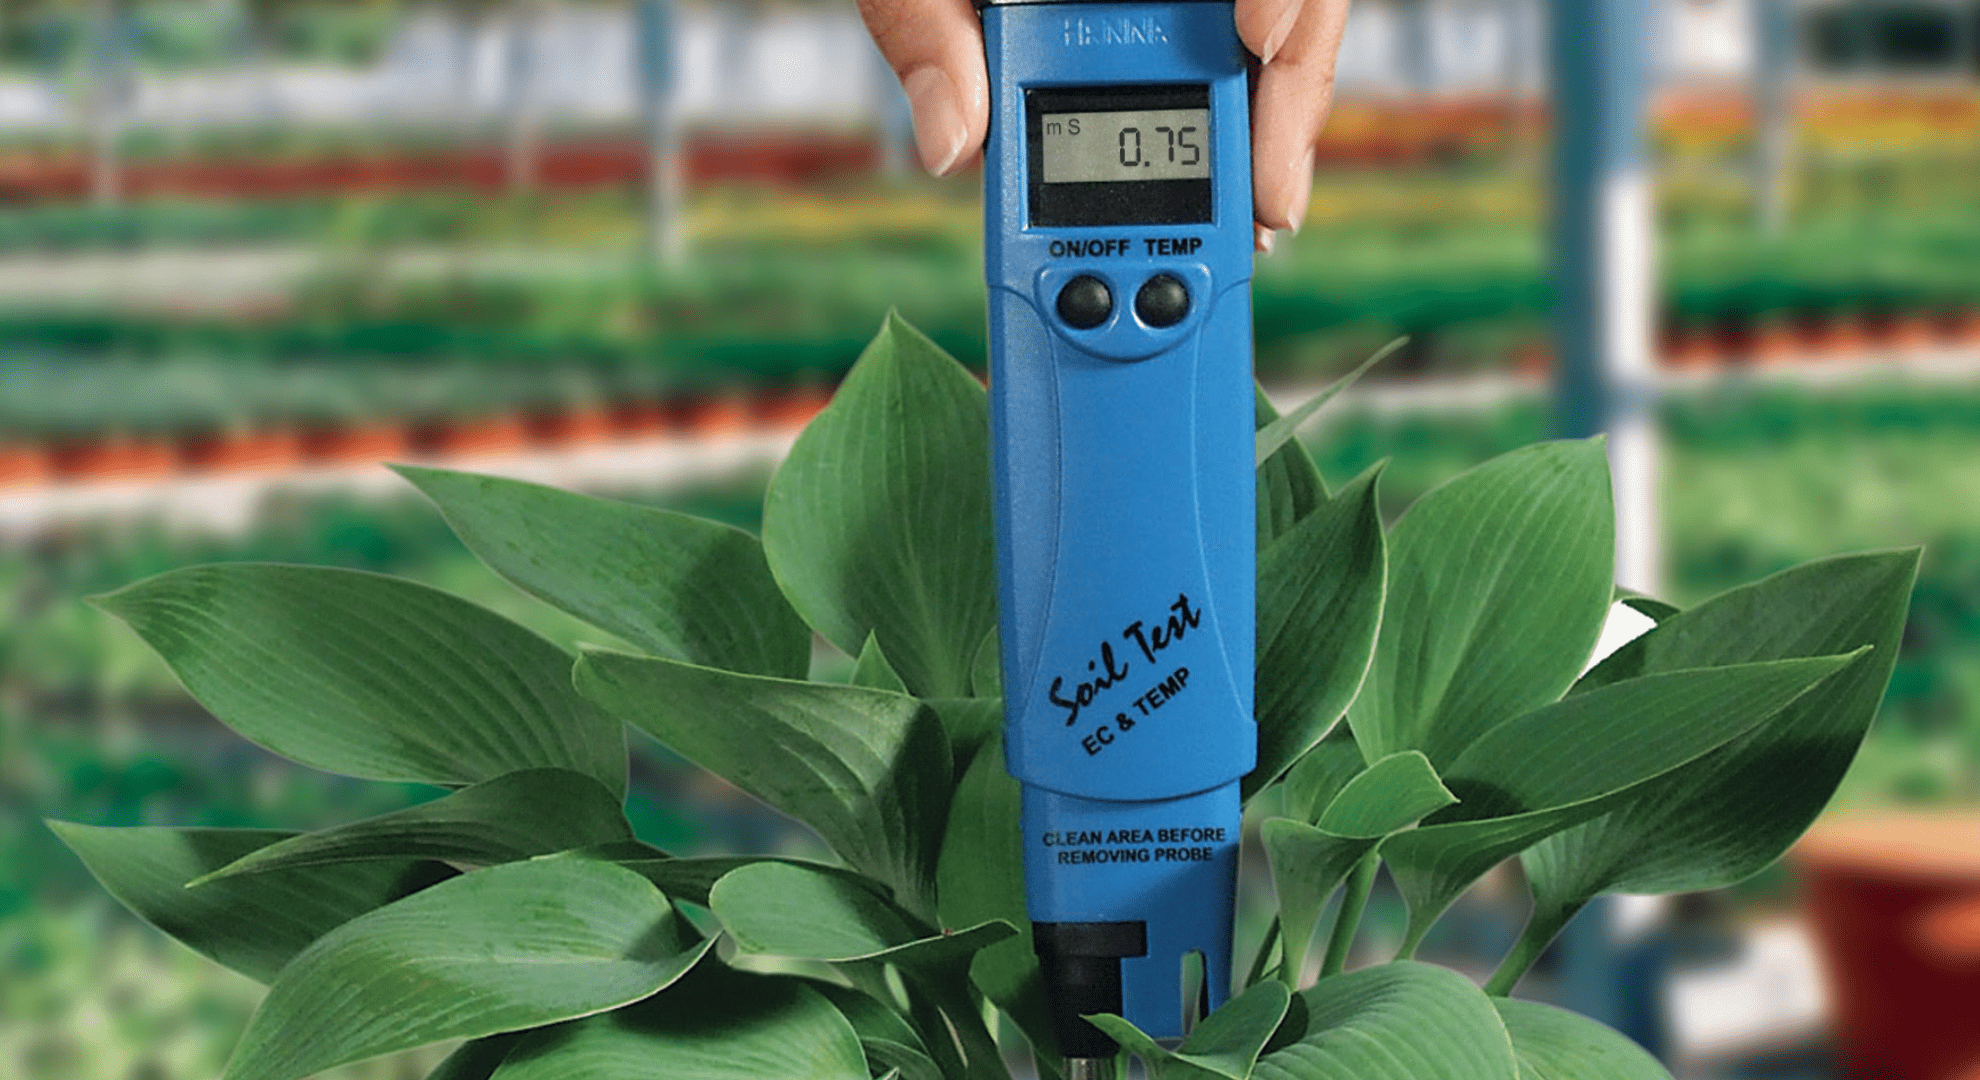
How to Test pH in Soil: The Complete Guide Ever wonder what else you can do to help your plants…

Subscribe to our newsletter